Trading accounts – your ticket to easier expense tracking
What is it?
Trading accounts are a clever way to tell which parts of the business are spending what. You can set up a trading account for different cost centres or locations, invite shoppers to buy for certain accounts and easily track spending through monthly reports.
Who is it for?
This feature is available to Work Hub admins who are conscious of staying on budget. It’s useful for large organisations with multiple sites or departments who regularly order groceries for the business. Finance teams might also find it helpful to analyse and report on spending between different parts of the business. And for business leaders, it’s a simple way to understand company-wide spending activity to help inform budgeting decisions.
How does it work?
Trading accounts allow you to differentiate purchases between locations or cost centres within your business. When you set up a new trading account, you can assign shoppers to order for that location and add a unique code for easy internal expense tracking.
For example, if you’re a florist with six locations across the state, you might set up a trading account for each store and invite the store manager to place orders for that location. That means you’ll be able to manage all grocery purchases through a single business account, minimising paperwork, while seeing exactly how much each store is spending, maximising visibility.
How to add a trading account?
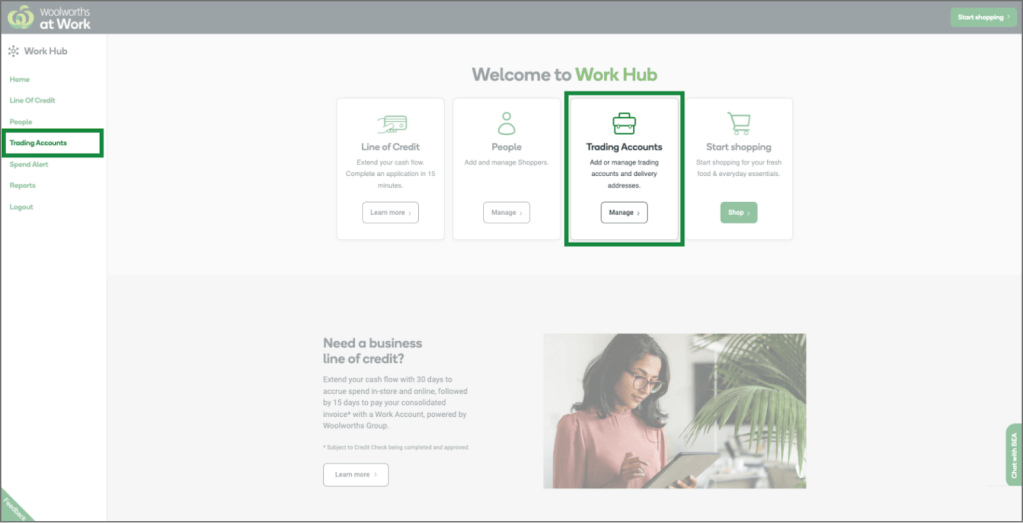
Step 1: Visit Work Hub and navigate to the ‘Trading Accounts’ page.
When you log in, you should see ‘Trading accounts’ on the Work Hub homepage, or you can select it from the menu on the left.
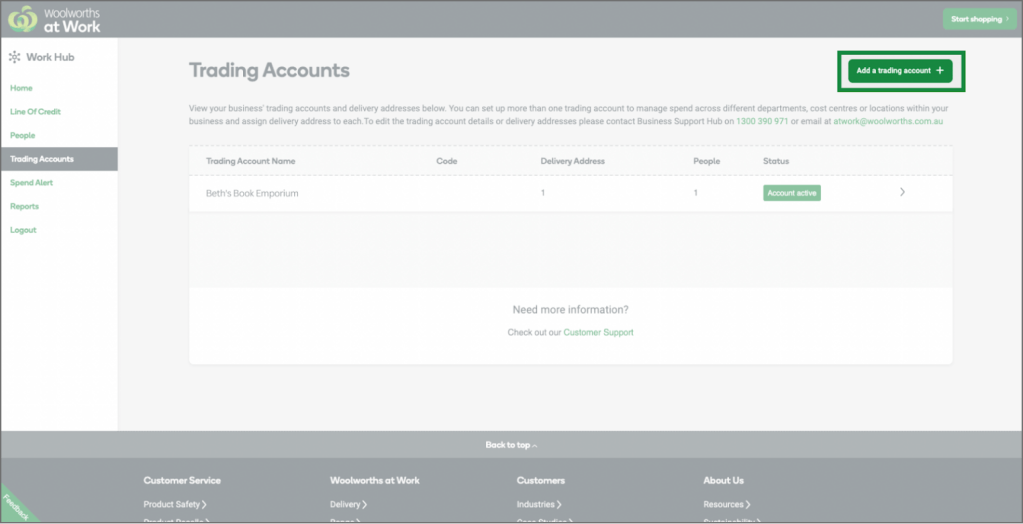
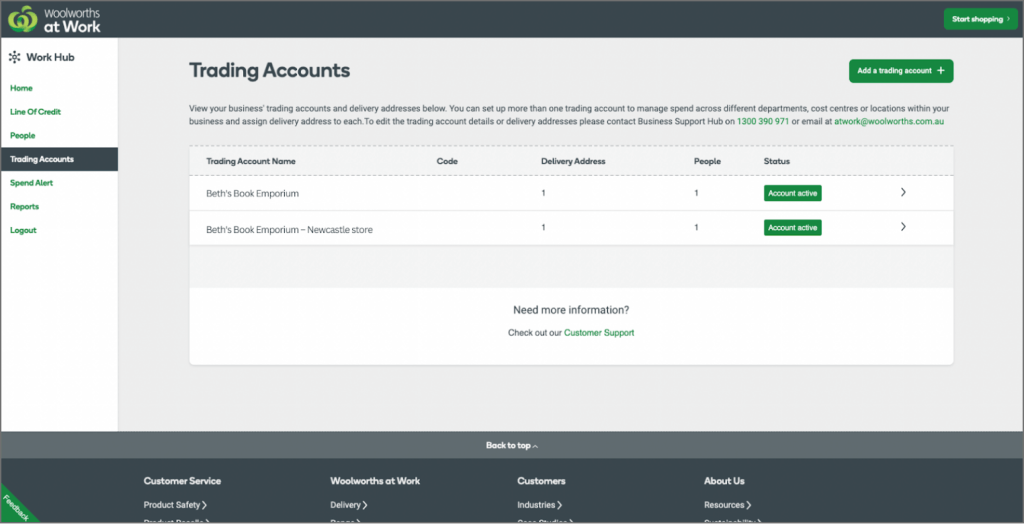
Step 2: On the Trading Accounts page, select the ‘Add a trading account’ button
This page is where you’ll see your listed trading accounts once you’ve added them, along with their status and the number of people registered to shop for that account. Your business will have one default trading account already in your business’s name. You can update this later.
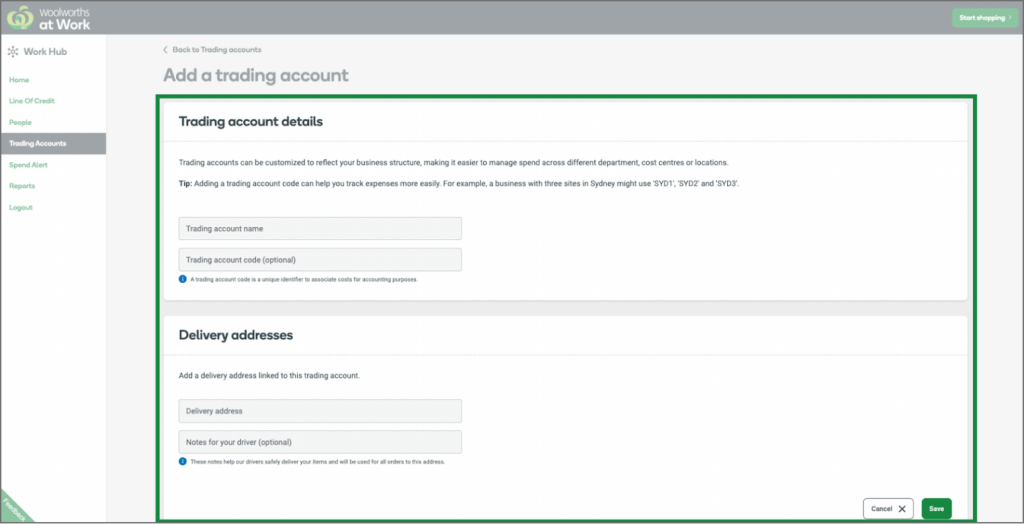
Step 3: Enter your trading account details
You’ll need to give your trading account a name. E.g. ‘Bourke St store’ or ‘Sydney office’. You can also add a trading account code to help with internal expense reporting.
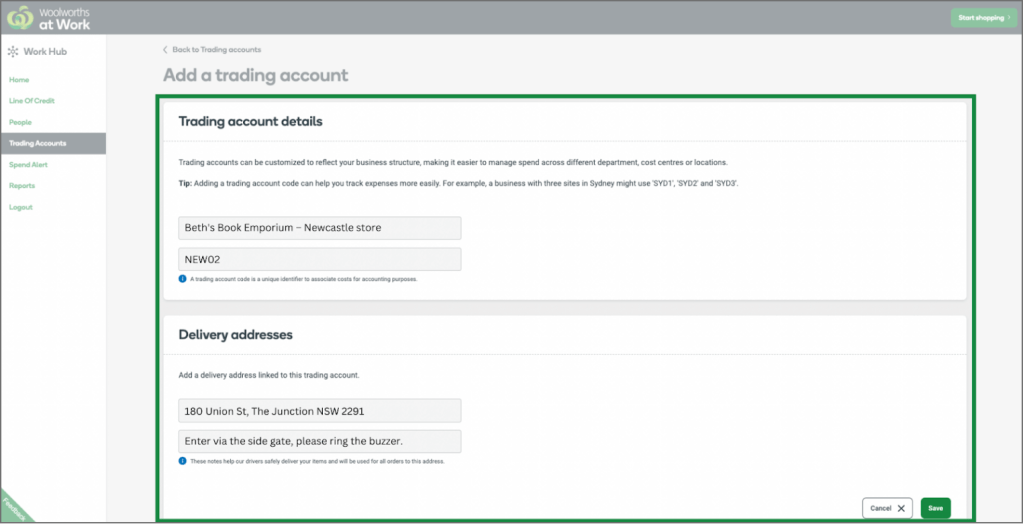
Then, you can add the default delivery address for this trading account, along with any instructions for locating or accessing the building.
Once you’ve entered the details, hit ‘save’.
Step 4: Assign shoppers to your new trading account
Once your trading account has been created, you’ll need to assign people to shop for that account. Head to the ‘People’ page and select the person you’d like to assign to your trading account. Under the ‘Trading Account’ section, select the ‘Edit’ button to add or remove access to different trading accounts.
You can also assign any new shoppers to a specific trading account when you send out the invite.
Ready to customise your account setup? Add a new trading account today.
Need a hand getting set up? Get in touch with our Business Support Hub.


